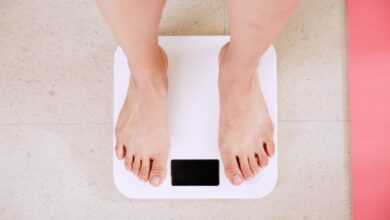
Want to tone your hips and thighs without hitting the gym? You’re in the right place! As a certified fitness trainer, I’ve helped tons of people sculpt their lower body right at home. These six moves are simple, effective, and require no special equipment. Get ready to feel the burn and see results!

Why Focus on Hips and Thighs?
Beyond just looking great in your favorite jeans, strong hips and thighs are crucial for overall health and fitness. They support your body, improve balance, and help you move efficiently. Working these muscles can also boost your metabolism and reduce the risk of injuries. Plus, a good lower body workout can do wonders for your confidence!
Important Safety Tips Before You Start
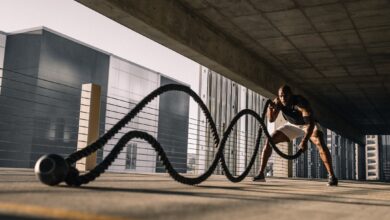
Before diving in, let’s cover some basics. Always warm up your muscles with light cardio, like jogging in place or jumping jacks, for about 5-10 minutes. This prepares your body for the workout and reduces the risk of strains. Listen to your body – if you feel any sharp or sudden pain, stop immediately. It’s better to take a break than to push yourself too hard and risk injury. And don’t forget to cool down with some gentle stretching after you’re done. Hydration is key too, so keep a water bottle handy!
6 Moves to Sculpt Your Hips and Thighs at Home
1. Squats
Squats are a classic for a reason! They work your quads, hamstrings, glutes, and even your core. Here’s how to do them properly:
Stand with your feet shoulder-width apart, toes slightly pointed outward. Keep your back straight and your core engaged. Lower yourself down as if you’re sitting in a chair, keeping your knees behind your toes. Aim for your thighs to be parallel to the floor. Push back up to the starting position using your heels and glutes. Repeat for 12-15 repetitions.
2. Lunges
Lunges are fantastic for targeting each leg individually, helping to improve balance and coordination. They sculpt your thighs and glutes like a charm.
Stand tall with your feet together. Step forward with one leg, lowering your body until both knees are bent at 90-degree angles. Make sure your front knee is directly above your ankle and your back knee is hovering just above the floor. Push off with your front foot to return to the starting position. Repeat on the other side. Aim for 10-12 repetitions per leg.
3. Glute Bridges
Glute bridges are amazing for isolating your glutes and hamstrings. They’re also gentle on your knees, making them a great option for beginners.
Lie on your back with your knees bent and feet flat on the floor, hip-width apart. Engage your core and squeeze your glutes to lift your hips off the floor, creating a straight line from your shoulders to your knees. Hold at the top for a second, then slowly lower back down. Repeat for 15-20 repetitions.
4. Side Leg Raises
These target the outer thighs and hips, helping to tone those often-neglected muscles.
Lie on your side with your legs straight and stacked on top of each other. Keep your core engaged to stabilize your body. Slowly lift your top leg up towards the ceiling, keeping it straight. Lower it back down with control. Repeat for 12-15 repetitions on each side.
5. Fire Hydrants
Fire hydrants (also known as donkey kicks) are another great exercise for targeting the glutes and outer hips. They really help to shape those muscles.
Start on your hands and knees, with your hands directly under your shoulders and your knees directly under your hips. Keep your back flat and your core engaged. Lift one leg out to the side, keeping your knee bent at a 90-degree angle. Imagine you’re a dog lifting its leg to a fire hydrant! Lower your leg back down with control. Repeat for 12-15 repetitions on each side.
6. Curtsy Lunges
Curtsy lunges are a variation of the traditional lunge that targets the glutes, inner thighs, and quads. They’re a fantastic way to add some variety to your workout.
Stand with your feet shoulder-width apart. Step back with your right leg and cross it behind your left leg, lowering your body into a lunge. Keep your front knee behind your toes. Return to the starting position and repeat on the other side. Aim for 10-12 repetitions per leg.
Putting It All Together: A Sample Workout Routine
Here’s a sample workout routine you can follow, performing each exercise for the recommended number of repetitions. Rest for 30-60 seconds between each set.
Warm-up: 5 minutes of light cardio
Workout:
- Squats: 3 sets of 12-15 repetitions
- Lunges: 3 sets of 10-12 repetitions per leg
- Glute Bridges: 3 sets of 15-20 repetitions
- Side Leg Raises: 3 sets of 12-15 repetitions per side
- Fire Hydrants: 3 sets of 12-15 repetitions per side
- Curtsy Lunges: 3 sets of 10-12 repetitions per leg
Cool-down: 5 minutes of stretching
Aim to do this workout 3-4 times per week, with rest days in between. As you get stronger, you can increase the number of sets or repetitions, or add weights for an extra challenge.
Frequently Asked Questions
How long will it take to see results?
Consistency is key! You’ll likely start to feel stronger within a few weeks, but visible results usually take around 4-6 weeks with regular exercise and a healthy diet. Remember, everyone is different, so be patient and focus on progress, not perfection.
Can I do these exercises if I have bad knees?
It’s always best to consult with your doctor or physical therapist before starting any new exercise program, especially if you have pre-existing conditions. However, some of these exercises, like glute bridges, are generally gentle on the knees. You may need to modify other exercises, such as squats and lunges, to reduce the stress on your knees. Focus on proper form and listen to your body.
Do I need to use weights?
These exercises are effective even without weights! However, as you get stronger, adding weights can help you continue to challenge your muscles and see further results. You can use dumbbells, resistance bands, or even household items like water bottles or cans of food.
What if I can’t do all the repetitions?
That’s perfectly fine! Start with what you can comfortably do while maintaining good form, and gradually increase the number of repetitions as you get stronger. It’s better to do fewer repetitions with proper form than to struggle through more repetitions with poor form.
Final Thoughts
Sculpting your hips and thighs at home is totally achievable with these six moves. Remember to warm up, focus on proper form, and listen to your body. Consistency is crucial, so stick with it, and you’ll be amazed at the results you can achieve. Now get out there and start sculpting!
Related Posts
| How To Lose Thigh Fat At Home 7 Simple Exercises |